Showing posts with label Product Review. Show all posts

Thursday, March 7, 2013

Milani 3D Holographic Polish Swatches - Part 2

Hello everyone! Guess who's back!? Today I have the 2nd part of the Milani 3D Holographic Polishes. Unfortunately these aren't sold in main stores like CVS anymore but you still should be able to find them online! I guess that's what happens when you go poof for like 3 months...


The polishes I'm swatching for you today is HD, Digital, and Hi-Res.


HD


One thing about this polish is even in low light/indoor settings, it still glows and is extremely holographic!


HD is a mix between a linear and scattered holo polish. It's the most concentrated holo out of the collection since it has a clear base, but it's also the most sheer. It takes a TON of layers to get this opaque but surprisingly it doesn't look thick on the nail. One of my favorite polishes of all time. I was able to use some of this to make a Zoya Storm franken!


Hi-Res


I don't usually like purple but this is gorgeous!


Hi-Res isn't a polish I'd normally go for but this one is just stunning. One of the more holographic polishes of the bunch. It contains the usual holo flecks within a purple base.


Digital


You can still see VNL even though I believe this is 3 coats.

\

Digital isn't really one of my favorites. It's very sheer and the color just isn't my thing. A muted medium pink based polish with holo flecks. 

And there you have it! The 2nd and final installment of this collection! I'm so bummed that these are discontinued but I know Cherry Culture sells them so don't be dismayed! Hope you enjoyed my swatches and glad to be back!


Thursday, December 20, 2012

Milani 3D Holographic Polish Swatches - Part 1

Lately, these polishes have been selling at CVS for a whopping $1.49 and I had to pick myself a couple of them. In other words, I now have this whole collection, hehe. I'm just gonna do some quick swatching just in case someone else is interested in picking these up as well! Hurry though, they're going fast!


The 3 polishes I bring to you today are 3D, Cyberspace, and Hi-Tech.


3D


3D is a gold shimmer base with holographic fleck pieces. Scattered holo effect but not a very strong one either. Not very concentrated holo pieces. Wasn't a very big fan of the color but it was a good 2-3 coater.


Hi-Tech


Holographic goodness.


Hi-Tech is a bright green semi linear, semi scattered holographic polish, and possibly the most holo of the bunch! Another easy 2-3 coater.


Cyberspace


Another gorgeous polish. But I'm a sucker for blues. Meh.


Cyberspace is a dusky pale medium blue scattered holographic polish. It went on a little sheer but had no issues. More concentrated holographic fleck pieces in this one.

I love these polishes, especially Hi-Tech! Hope this helped! On to part 2!

Sunday, December 2, 2012

Layla Hologram Effects - Ocean Rush Swatch + Mini Review

Ocean Rush is the only other one besides Mercury Twilight that I own of the Layla Hologram Effect collection. It's a gorgeous medium blue (that leans more towards green) with a strong linear holographic effect. 


Can you believe this [picture above] is an unedited picture (excluding the water marks)? Ugh, these polishes photograph beautifully.


The application was so much easier than with Mercury Twilight, this being 3 coats. The formulas a tiny bit thicker which makes for more opaque coats, but the holo effect is not as strong, not saying that this isn't extremely strong. The wear time was just as bad as MT. I can say this because I didn't even wash my hair in the shower 3 minutes ago and I still got severe tip wear. 


I bought my bottles off of HauteLook when Layla was selling on there for around $9, with each bottle being accompanied by a free Layla buffing board. Normal retail price is $15.50 each bottle.


Here's an overly edited picture that I thought was cool looking. (Above)


And lastly, a picture of it on a cloudy Sunday morning. Extremely color accurate from my perspective. 

Hope you enjoyed my swatches! Adios!

Saturday, December 1, 2012

Layla Hologram Effects - Mercury Twilight Swatch and Mini Review

Today I'm going to be swatching this beauty for you, as well as reviewing it a little, with an explanation  on application. 


Mercury Twilight is a silver holographic polish with a very strong linear effect. Isn't it a beaut!


For my application, I didn't use any base coat. I don't currently own an aqua base, and using any other base coat has only made application more difficult for me, personally. The trick for me is to seriously just be more patient. Also, buffing your nails smooth is a very important factor for easier application and just overall better looks. You don't need the specific Layla emery board; anything will do.

- When applying coats, make them somewhat thick and NEVER go over one place twice; if you have a bald spot, just go over it with the next coat. Let it dry. When it's try, it'll lose it's sheen and will become more satiny looking in the light. After the desired amount of coats, put your hands under low light and you should be able to see your missed spots. This is when you spot coat. With a decent amount of polish on the brush, go from the top of the nail, all the way to the end, going over your bald spots. The beauty about this polish is that it evens out by itself and it dries extremely fast. Last thing, NEVER apply a top coat for this holographic polish, I've tested it out and yes... it does dull the holo effect.


I added this picture for the sake of it being cool lookin'. Haha, expect this as my next banner for when I update my blog layout.

This is a gorgeous, GORGEOUS polish and it would be my favorite one of all time if the wear time wasn't horrendous. Without a base coat or top coat, this polish chipped ridiculously. This mani held through for a good hour with no chipping, but once I showered, so much had chipped off. I still kept this polish on for 3 days afterwards though because it was so pretty even with all the horrible tip wear. The application for me was extremely smooth because of how fast it dried. This can be a little pricey at $15.50 USD for such a small bottle and considering how much polish you actually use per manicure. Would I buy this again? I'm not too sure. I feel like I could get a longer lasting strong holographic polish for a cheaper price (Color Club, I'm looking at you) but for my strongest holo of my collection, I'm in love and I don't regret buying it.

Hope you enjoyed my swatches! How do you feel about this polish?

Tuesday, November 13, 2012

Swatch: OPI DS Reserve

I only got into the whole DS polish scene recently because I just never wanted to shell out that much money for a nail polish, not that I had the money in the first place! But since drugstore.com was having a 40% beauty products sale, I got this for a little less than $7 (with OPI DS Classic still on the way!) and I'm SO glad I did. I'm not sure about the other polishes but this is a GORGEOUS polish.


This polish is one of those where they chance color with lighting. Depending on the lighting it could look warm in lower lighting, and can look cooler in more natural lighting. 


It has a scattered holo effect that shows as silver glitter/shimmer in darker lighting but in bright lighting it glows with holographic goodness! The formula was immaculate! If you really wanted to you could make this a 1 coater but I prefer doing 2 thin coats always. It dried super fast and still hasn't chipped even though I am absolutely brutal with my hands. I'm trying to work on getting them healthier though. You can see by my cuticles...  


You can see the gorgeous scattered holo effect here. 


And here! 


See how in certain lighting it could look cooler? 

Love this polish.

Friday, September 21, 2012

Maybelline Color Show Nail Polish - Boho Gold

Just going to be doing a simple swatch spam of the Maybelline Color Show LE 2012 Nail Polish in Boho Gold, the famous "dupe" of Chanel Peridot. I've read a lot of reviews and apparently they're not the same but they're somewhat similar, both with their own beautiful touch. All of my swatches are over a black base (Essence Colour & Go Black is Back) and then 4 extremely thin coats.
Probably the most gorgeous polish (bottle wise) that I own.
Six coats (including the black) and still doesn't look thick on the nail.
This polish is going to show streaks so if you want it to look at its best, apply super thin, clean strokes. 


In the two pictures you can finally start seeing some blue! Light has to hit it at the right spot though.


The polish in direct sunlight
\
Can you see some pink on my middle finger showing?

I was worried I'd never find this polish since I wasn't able to find it anywhere until I went to Tops (a grocery store) but I'm so glad I did. I'm just so in love. I can't stop looking at my nails right now!

Tuesday, September 18, 2012

ELF Studio Shimmer Palette Review

I was requested ages ago to review this and I'm sorry I didn't do this sooner! Anywho, stop stalling Alma... Today I bring you the ELF Studio Shimmer Palette. According to ELF:

"The weightless and creamy shimmers illuminate the eyes, lips, and face. Gives skin a healthy and natural glow. Mix and match colors to create your unique look."

One thing I can say about all that mumbo jumbo... "Holy shimmer, Batman!"

(Yes, I did take that picture and I am just as baffled as you are that I did.)

This shimmer palette currently only comes in one set of colors and is priced at $3 on eyeslipsface.com. I was able to score mine for $1.80 at K-Mart a couple months back so maybe if you search around enough, you might find one of these in one of the clearance bins. 

The product...

- As mentioned above, there is only one set of colors available right now. There's white, champagne, nude, and a pink, all extremely shimmery, thus naming this a shimmer palette.


- In the palette itself, they all look fairly different in color, but depending on how thick you apply it on, it could either look extremely shiny and different, or they could all look pretty much the same if applied thinly. 
- The consistency is similar to that of the ELF cream eyeshadows, particularly similar in consistency to the cream shadow in Bronzed. It's thin but very very pigmented. You can seriously swipe your finger on top of it for a nano-second and you could potentially be picking up too much product. 


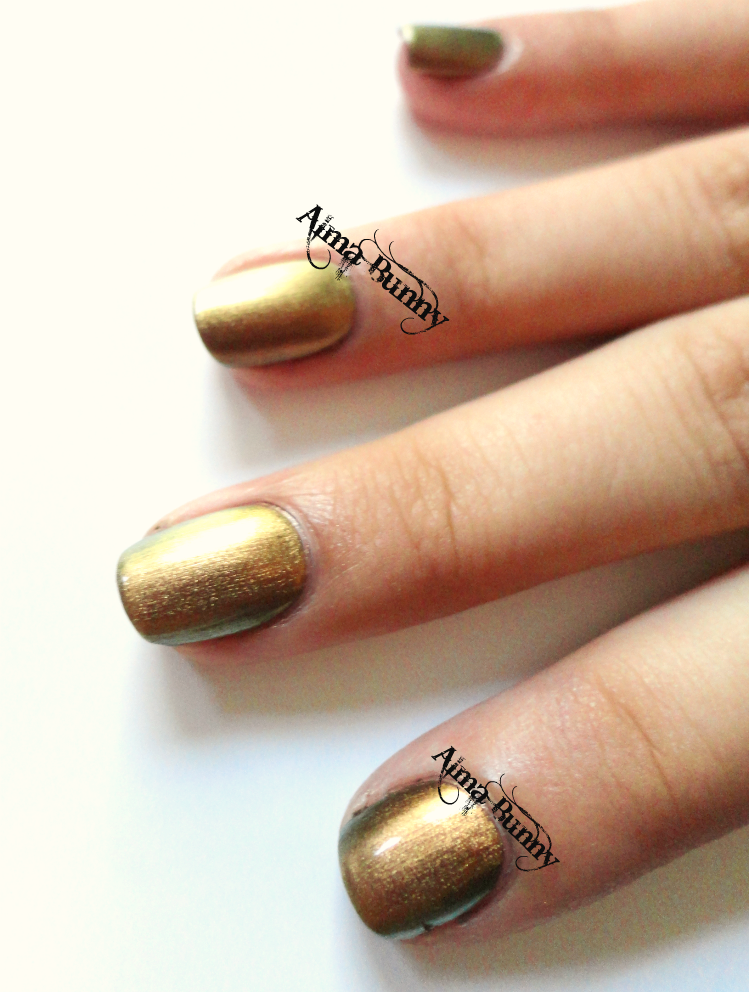
- This is a badly taken picture of the shimmers in action (indoor natural lighting) and you can see that they have a magnificent sheen. This was one swipe of product. As far as colors, you can see that the pink is definitely the most different in color. The white being the second. 


- Here they are (with flash) and you can see more of a difference in colors, pink, as before, with the most prominent in color difference. 'Scuse my gross veiny hand...

- These are pretty greasy feeling to the touch and with oily skin you probably will not be having the most desirable experience with this product. What I'm trying to say is:
  • Do NOT use this as a base for your eyeshadow unless you want your eyeshadow seeping into your eyes on a hot summer day/a long day. 
  • The wear time of this product depends on your skin type. Assuming you have oily skin, it'll probably wear off tons quicker than a person with dry skin.
  • It may make your skin look extra greasy if you put on too much.
Ways to use this:
  • You can use this as a highlight of course! This would be a beautiful highlight for your face (IF USED SPARINGLY.)

    - You can highlight via the "C" shape in which you put some under your brow bone and on your cheek bone and add a tiny bit of shimmer to connect the two. With the right amount of product and with the perfect ray of sunlight, it will look absolutely stunning. I would probably not suggest using the pink one for this unless that's your style...
    - Going further with highlighting, use a tiny bit on the bridge of your nose, cupid's bow, everywhere else you'd high light on your face!
    IF YOU'RE DARING ENOUGH, use it around your eyes! Highlighting the inner corners of your eyes, brow bone, etc.
    - Honestly I can't really think of using this as anything else unless you like frosty lip colors...
Verdict...
I'm not sure how I feel about this product because honestly I'm not a shimmer kind of gal. If you want an alternative to this product by ELF, you can try one of the Essential Shimmering Facial Whips (I have one in Spotlight.) The difference between these two shimmery products is that the essential line one has an Orange Creamsicle smell to it and it's also rather thick and can sometimes be hard to blend out. I heard that the All Over Color Stick is basically the same way but in a solid form. 

At $3 for a decent amount of product and sleek packaging, it's not bad. Definitely not as expensive as the Benefit High Beam liquid highlighter. It doesn't have a fragrance to it (which I love because almost all products that do break me out BAD) and the consistency is slick and smooth. 

I haven't reached for this very much but when I have I used it for this: 


When wearing a certain top or a dress, I'll use this product to highlight my shoulders, prominent bony areas around my neck, etc. I think doing this will add a beautiful touch to a person's look without making them look like they have sunburn and shiny skin.

What do you think of the ELF Studio Shimmer Palette? Is it just TOO shimmery for you? What would you use it for?

Thursday, February 9, 2012

ELF Studio Conditioning Balm SPF 15 Review + Lip Swatches

I'm just going to be doing a quick review on the ELF Studio Conditioning Balms which have I've seen to have a lot of great reviews. Since I own a couple myself, I figured I would do my own review on these! Today I'll be reviewing these in the colors Nice & Natural, Peaceful Pink, and Mellow Melon as well as telling you how I apply these.

When my older sister first saw these the first thing she said was "oh my god. why are they like that?" She was referring to the packaging, haha. The packaging of these are really unnecessarily bulky. Some people have some issues with this, such as my older sister, but I myself don't mind all that much.

Sursly nao? Anyway, these are the 3 lightest colors that they have available right now. I was able to snag Mellow Melon for only a $1.80 at my local K-Mart. The other two I got for $3 each at the same K-Mart.

Some Things to Note + Application:
  • These are very comfortable on the lips. I am very particular about how lip products feel on my lips. If it feels too greasy or too dry I will take it off shortly after because I really don't have the tolerance for it. I really have no problem with these.

  • If you take too long to apply these they will become really greasy feeling. So, work diligently when spreading these on your lips! I had a huge problem with this when applying Peaceful Pink.

  • This product has an SPF of 15 which I think is excellent. It not only is a great lip balm but it adds additional protection when conditioning your lips.

  • These have a sweet smell and taste that I think is similar to the ELF Hypershine Lip Glosses.

  • These can be applied very opaquely or they can be sheered out. What I do if I want an opaque application is that I pick out a chunk onto the top of the longest nail I have and I place the chunk onto my lips. Using my fingers I apply it because it warms the product up making it easier to spread out. It sounds kind of silly but it works for me! Thus I don't have to get any product stuck under my nails.

  • You can apply these with a lip brush but make sure it's a short bristled dense one for more precise control!

  • One very important thing to note is the fact that people have had some reactions to the formulation of this. They have noted some warm stinging sensations, some being unable to continue using this product because of it. Me, personally, I do feel a bit of a warm sensation but it isn't anything that I cannot tolerate. I'm looking at the ingredients and I'm thinking maybe it's the Mineral Oil?
Top: Nice & Natural, L-R Bottom: Mellow Melon, Peaceful Pink
  • Nice & Natural is a really light nude color with a pink tint to it. Out of the 3 I have, this is the least pigmented. Just like any nude lip color it will accentuate the dry spots on your lips so just beware. For my skin color which is an NC 35 it is such a perfect nude for me. This didn't last very long on my lips though.

  • Mellow Melon is a bright watermelon color. This was the most pigmented of the bunch. I had the least problems as far as streakiness and application.

  • Peaceful Pink is a light bubblegum pink. This didn't work well with my skin color very well at all. I noticed that the more I spread it out on my lips the lighter the color got than what it was in the pot.
Lip Swatches

Verdict?
Well, I think these are a great alternative to lipsticks since they aren't extremely bold and opaque but they do give a great color payoff. Plus the added bonuses such as SPF and the conditioning property! What I do think is that they should try and figure out what is going on with the stinging sensation and how they should change the formula. I really am happy with these and I'm actually interested in getting Blissful Berry so hopefully I'll get one of those sooner or later.

Have you tried these? What do you think? Let me know!
Related Posts Plugin for WordPress, Blogger...